What is Mr403Forbidden ransomware? And how does it work?
Mr403Forbidden ransomware is another file-encoder Trojan virus that was reported on July 19, 2017. According to the initial threat analysis, this ransomware is based on the Haters ransomware which also goes by the names Stupid ransomware and FTSCoder ransomware. The ransomware got its name because of the string it uses during the encryption process which is “Encrypting By ./Mr403Forbidden that is found on its code.
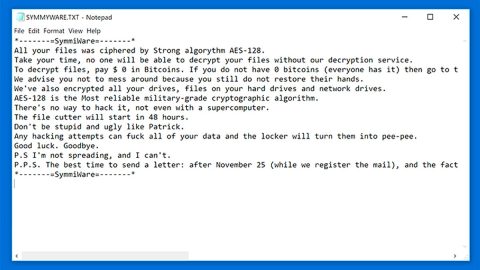
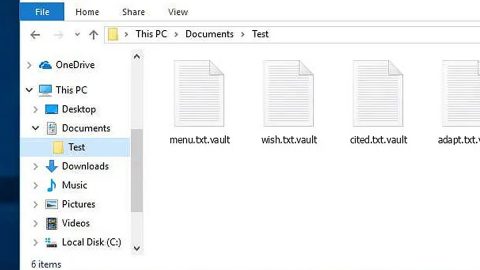
Mr403Forbidden ransomware is designed to look for accessible disks and removable media and scans them to look for certain files to encrypt. After that, it modifies the Windows Registry to suppress security notifications and warnings. It also disables Web filters so that it can communicate to its Command and Control server. The ransomware proceeds to generate a pair of encryption and decryption keys before it starts the encryption process. As per our researchers, Mr403Forbidden ransomware encrypts different file types such as images, audio, video, important documents like PDF files, databases, spreadsheets and a whole lot more. It then appends the .alosia extension. For instance, the file images.jpg will be modified to images.jpg.alosia. It releases its ransom note on a pop-up window labeled as “File Anda Terkunci!!!” which is an Indonesian language and means Your files are locked in English. You may assume that the ransom message is also written in Indonesia, however, it is not. In fact, it is clearly written in English containing the following message:
“Your Computer files is encrypted
all files with extremely
powerfull new ./Mr403Forbidden encryption
that no one can break except you have
a private string and IVs
To decrypt all file please pay us a money contact me :
[email protected] or
[email protected]
insert your code here:
[TEXT BOX] Decrypt!’
The ‘forbiddenmr403”
It may threaten you that there is no other way to decrypt your files but to pay them. However, that is not the case. You should not panic when you see the pop-up ransom note, instead, look for alternative ways to get rid of the infection and recover your files.
How does Mr403Forbidden ransomware reach your computer?
You’ve most likely obtained Mr403Forbidden ransomware when you were on gaming sites or when you download a corrupted torrent file. You can also get infected with this malware when you’ve downloaded a corrupted attachment from unknown senders since this ransomware also spreads through spam emails. These attachments may be .docx files which are Macro-enabled. Through Macro scripts the crooks behind this ransomware is able to infiltrate your computer. That’s why it is always important to remember that most of the cyber criminals these days are using some well-known company’s name in sending these kinds of spam emails. So it is better to check the sender first before opening the email or downloading the attachment.
To eliminate Mr403Forbidden ransomware form your computer, follow the removal instructions below:
Step 1: Close the pop-up window that contains the ransom note.
Step 2: Restart your PC into Safe Mode.
Windows XP/Vista/7
- Reboot your computer.
- Tap F8 when you see the BIOS screen.
- Select Safe Mode from the Advanced Boot Options menu using the arrow keys on your keyboard.
- Press Enter.
- And then proceed to remove the Mr403Forbidden ransomware.
Windows 8/8.1/10
- Tap two buttons: the Windows key and C on your keyboard and click Settings (if you use Windows 8/8.1) or click on the Start button (if you use Windows 10).
- Click Power.
- Hold the Shift key and click Restart.
- Click Troubleshoot.
- Click Advanced options.
- Click Startup Settings.
- Click on the Restart button.
- Tap F4.
- Proceed removing the Mr403Forbidden ransomware when your PC starts in Safe Mode.
Step 3: Open the Windows Task Manager by pressing Ctrl + Shift + Esc at the same time. Proceed to the Processes tab and look for Mr403Forbidden.exe or any suspicious processes that can be related to the Mr403Forbidden ransomware.

Right-click on the processes, then click Open File Location and scan them using a powerful and trusted antivirus like SpyRemover Pro. After opening their folders, end their processes and delete their folders. If the virus scanner fails to detect something that you know is suspicious, don’t hesitate to delete it.
Step 4: Open Control Panel by pressing Start key + R to launch Run and type appwiz.cpl in the search box and click OK.

Look for Mr403Forbidden ransomware or any suspicious program and then Uninstall.

Step 5: Hold down Windows + E keys simultaneously to open File Explorer.
Step 6: Go to the directories listed below and delete everything in it. Or other directories you might have saved the file related to Mr403Forbidden ransomware.
- %AppData%
- %Roaming%
- %USERPROFILE%\Downloads
- %USERPROFILE%\Desktop
- %Temp%.
Step 7: Look for the components of Mr403Forbidden ransomware and then delete all of them.
The next step below is not recommended for you if you don’t know how to navigate the Registry Editor. Making registry changes can highly impact your computer. So it is highly advised to use PC Cleaner Pro instead to get rid of the entries that Mr403Forbidden ransomware created. So if you are not familiar with the Windows Registry skip to Step 12 onwards.

However, if you are well-versed in making registry adjustments, then you can proceed to step 8.
Step 8: Open the Registry Editor, to do so, tap Win + R and type in regedit and then press enter.
Step 9 Navigate to the path below:
HKEY_CURRENT_USER\Software\Microsoft\Windows\CurrentVersion\Run
Step 10: Look for the entries that Mr403Forbidden ransomware have modified and delete the any suspicious registry value.
Step 11: Close the Registry Editor.
Step 12: Empty the Recycle Bin.
Follow the continued advanced steps below to ensure the removal of the Mr403Forbidden ransomware:
Perform a full system scan using SpyRemover Pro. To do so, follow these steps:
- Turn on your computer. If it’s already on, you have to reboot
- After that, the BIOSscreen will be displayed, but if Windows pops up instead, reboot your computer and try again. Once you’re on the BIOS screen, repeat pressing F8, by doing so the Advanced Option shows up.
- To navigate the Advanced Optionuse the arrow keys and select Safe Mode with Networking then hit
- Windows will now load the SafeMode with Networking.
- Press and hold both R key and Windows key.
- If done correctly, the Windows Run Boxwill show up.
- Type in explorer http://www.fixmypcfree.com/install/spyremoverpro
A single space must be in between explorer and http. Click OK.
- A dialog box will be displayed by Internet Explorer. Click Run to begin downloading SpyRemover Pro. Installation will start automatically once download is done.
- Click OK to launch SpyRemover Pro.
- Run SpyRemover Proand perform a full system scan.
- After all the infections are identified, click REMOVE ALL.
- Register SpyRemover Proto protect your computer from future threats.


