What is Tigobully? And how does it work?
Tigobully is a browser extension that is advertised using pop-up windows that says, “Add Extension In Order to keep you in safe browsing”. This may be presented when you click on ads and banners. Tigobully is categorized as both a browser hijacker since it alters your browser’s settings and a Potentially Unwanted Program (PUP) because it can be a potential threat to your computer’s security. Luckily, this browser hijacker only works on Google Chrome browser, so you won’t have much trouble in removing it. Nevertheless, you should not wait and let it stay longer on your computer for you might face serious problems if you do so.
As expected, when unwanted programs like Tigobully enter your computer, they quickly alter your browser’s settings so it’s no wonder why your home page and search provider suddenly changes. Once this happens, you will be constantly facing intrusive ads and pop-ups that could be troublesome and annoying when you browse the internet. You could also be exposed to malicious contents that could bring in more infection you can’t handle. So before it gets to that point, be sure to remove it immediately.
How is Tigobully distributed?
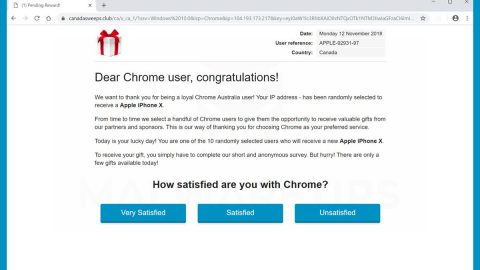
According to our researchers, Tigobully was once distributed on the Chrome Web Store but now its page has been closed and so it no longer has any official downloading site. However, our researchers found out that this unwanted program usually comes from random pop-ups that you encounter when you surf the internet, for example, you were rerouted to a suspicious website which mostly contains sponsored contents and ads that may contain download links to unwanted programs such as Tigobully.
Tigobully can also be obtained from websites who cater to free software. These sites use bundling technique in distributing software. Although some software are legit, these software are often bundled with suspicious ones like Tigobully and usually ends up getting installed as well. To prevent that from happening, you have to be extra careful when you install freeware and choose the Custom or Advanced installation option instead of the quick one so that you can supervise every nook and cranny of the installation process.
To remove Tigobully, follow the removal instructions below:
Step 1: Launch Google Chrome.
Step 2: Click the wrench icon. And from the drop-down menu click on Tools and then select Extensions.

Step 3: Under the Extensions tab, select Tigobully or other suspicious browser extensions related to it and then click on the Trash icon.

Step 4: Click on Remove button from the confirmation dialog box.

Step 5: Reset Google Chrome. To do that, click the three stripes icon located at the upper-right corner of your screen. And then select Settings.

Step 6: under Settings, look for Show advanced settings at the bottom of the page and click on it.

Step 7: Then click on the Reset browser settings button.

Step 8: After that, a dialog box pops up, click the Reset button to Reset Chrome.

Step 9: After you reset Chrome, enable the Phishing and Malware Protection in Chrome to prevent PUPs like Tigobully from infecting your computer again in the future. To do that, click Settings once again.

Step 10: Select the Show advanced settings again.

Step 11: Go to the Privacy section and check the Enable phishing and malware protection option.

Step 12: Restart Chrome.
Step 13: Perform a full system scan using an excellent antivirus and anti malware program like SpyRemover Pro. Turn on your computer. If it’s already on, you have to reboot it.
-
After that, the BIOS screen will be displayed, but if Windows pops up instead, reboot your computer and try again. Once you’re on the BIOS screen, repeat pressing F8, by doing so the Advanced Option shows up.

-
To navigate the Advanced Option use the arrow keys and select Safe Mode with Networking then hit Enter.
-
Windows will now load the Safe Mode with Networking.
-
Press and hold both R key and Windows key.

-
If done correctly, the Windows Run Box will show up.
-
Type in explorer http://www.fixmypcfree.com/install/spyremoverpro
A single space must be in between explorer and http. Click OK.
-
A dialog box will be displayed by Internet Explorer. Click Run to begin downloading SpyRemover Pro. Installation will start automatically once download is done.

-
Click OK to launch SpyRemover Pro.
-
Run SpyRemover Pro and perform a full system scan.

-
After all the infections are identified, click REMOVE ALL.

-
Register SpyRemover Pro to protect your computer from future threats.