What is Cezar ransomware? And how does it implement its attack?
Cezar ransomware is a variant of the infamous Dharma ransomware family. Cezar first emerged on August 2017 and now it seems like its developers decided to update it as a new and improved version has been seen in the cyber community. This file-encrypting threat aims to lock important data in a targeted device. But before it starts the encryption, it first scans the system for certain file types such as follows:
.PNG .PSD .PSPIMAGE .TGA .THM .TIF .TIFF .YUV .AI .EPS .PS .SVG .INDD .PCT .PDF .XLR .XLS .XLSX .ACCDB .DB .DBF .MDB .PDB .SQL .APK .APP .BAT .CGI .COM .EXE .GADGET .JAR .PIF .WSF .DEM .GAM .NES .ROM .SAV CAD Files .DWG .DXF GIS Files .GPX .KML .KMZ .ASP .ASPX .CER .CFM .CSR .CSS .HTM .HTML .JS .JSP .PHP .RSS .XHTML. DOC .DOCX .LOG .MSG .ODT .PAGES .RTF .TEX .TXT .WPD .WPS .CSV .DAT .GED .KEY .KEYCHAIN .PPS .PPT .PPTX ..INI .PRF Encoded Files .HQX .MIM .UUE .7Z .CBR .DEB .GZ .PKG .RAR .RPM .SITX .TAR.GZ .ZIP .ZIPX .BIN .CUE .DMG .ISO .MDF .TOAST .VCD SDF .TAR .TAX2014 .TAX2015 .VCF .XML Audio Files .AIF .IFF .M3U .M4A .MID .MP3 .MPA .WAV .WMA Video Files .3G2 .3GP .ASF .AVI .FLV .M4V .MOV .MP4 .MPG .RM .SRT .SWF .VOB .WMV 3D .3DM .3DS .MAX .OBJ R.BMP .DDS .GIF .JPG .CRX .PLUGIN .FNT .FON .OTF .TTF .CAB .CPL .CUR .DESKTHEMEPACK .DLL .DMP .DRV .ICNS .ICO .LNK .SYS .CFG
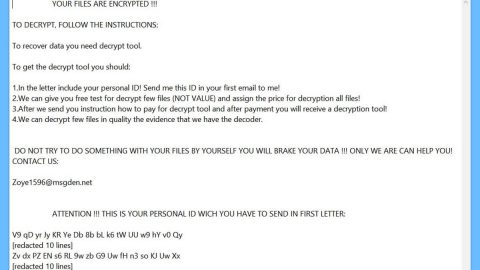
Once these files are found, the encryption process is initiated with the help of a strong encryption algorithm. Cezar ransomware then adds the .cezar file extension to each one of the encrypted data and demands a ransom in its note contained in a file named “HELP.txt” which entails a short and precise message that states:
“To decrypt files, write to my email [email protected]”
How are the malicious file(s) of Cezar ransomware disseminated?
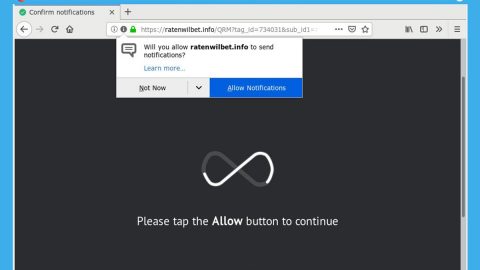
The malicious files of Cezar ransomware are disseminated via the old but gold spam emails. It’s no surprise that cyber crooks that developed this crypto-malware chose spam emails as it is one of the most common ways of disseminating ransomware threats like this one. So if you see any suspicious-looking emails in your inbox, do not hesitate in developing it.
Eliminate Cezar ransomware from your system by following the removal guide below as well as the advanced steps that follow.
Step 1: Tap the Ctrl + Alt + Delete keys to open a menu and then expand the Shutdown options which is right next to the power button.
Step 2: After that, tap and hold the Shift key and then click on Restart.
Step 3: And in the Troubleshoot menu that opens, click on the Advanced options and then go to the Startup settings.
Step 4: Click on Restart and tap F4 to select Safe Mode or tap F5 to select Safe Mode with Networking.
Step 5: After your PC has successfully rebooted, tap Ctrl + Shift + Esc to open the Task Manager.

Step 6: Go to the Processes tab and look for any suspicious-looking processes that could be related to Cezar ransomware and then end their processes.

Step 7: Exit the Task Manager and open Control Panel by pressing the Windows key + R, then type in appwiz.cpl and then click OK or press Enter.

Step 8: Look for Cezar Ransomware and other dubious program and then uninstall them.

Step 9: Close Control Panel and tap Win + E keys to open File Explorer.
Step 10: Navigate to the following locations and look for the malicious components created by Cezar ransomware and make sure to delete them all.
- %APPDATA%
- %TEMP%
- %APPDATA%\Microsoft\Windows\Start Menu\Programs\Startup\
- %USERPROFILE%\Downloads
- %USERPROFILE%\Desktop
Step 11: Close the File Explorer.
Before you proceed to the next steps below, make sure that you are tech savvy enough to the point where you know exactly how to use and navigate your computer’s Registry. Keep in mind that any changes you make will highly impact your computer. To save you the trouble and time, you can just use [product-name] this system tool is proven to be safe and excellent enough that hackers won’t be able to hack into it. But if you can manage Windows Registry well, then, by all means, go on to the next steps.
Step 12: Tap Win + R to open Run and then type in regedit in the field and tap enter to pull up Windows Registry.

Step 13: Navigate to the listed paths below and look for the registry keys and sub-keys created by Cezar ransomware.
- HKEY_LOCAL_MACHINE\Software\Microsoft\Windows\CurrentVersion\Run
- HKEY_CURRENT_USER\Software\Microsoft\Windows\CurrentVersion\Run
- HKEY_LOCAL_MACHINE\Software\Microsoft\Windows\CurrentVersion\RunOnce
- HKEY_CURRENT_USER\Software\Microsoft\Windows\CurrentVersion\RunOnce
- HKEY_LOCAL_MACHINE\SOFTWARE\Microsoft\Windows\CurrentVersion\Authentication\LogonUI\Background
- HKEY_LOCAL_MACHINE\SOFTWARE\Policies\Microsoft\Windows\Personalization
- HKEY_CURRENT_USER\Control Panel\Desktop\ScreenSaveTimeOut
- HKEY_CURRENT_USER\Control Panel\DesktopStep 14: Delete the registry keys and sub-keys created by Cezar ransomware.
Step 15: Close the Registry Editor and empty your Recycle Bin.
Try to recover your encrypted files using their Volume Shadow copies
Restoring your encrypted files using Windows’ Previous Versions feature will only be effective if Cezar ransomware hasn’t deleted the shadow copies of your files. But still, this is one of the best and free methods there is, so it’s definitely worth a shot.
To restore the encrypted file, right-click on it and select Properties, a new window will pop-up, then proceed to Previous Versions. It will load the file’s previous version before it was modified. After it loads, select any of the previous versions displayed on the list like the one in the illustration below. And then click the Restore button.

To ensure the removal of Cezar ransomware from your system including the malicious components it has created on your system, follow the advanced steps below.
Perform a full system scan using [product-code]. To do so, follow these steps:
- Turn on your computer. If it’s already on, you have to reboot
- After that, the BIOS screen will be displayed, but if Windows pops up instead, reboot your computer and try again. Once you’re on the BIOS screen, repeat pressing F8, by doing so the Advanced Option shows up.

- To navigate the Advanced Option use the arrow keys and select Safe Mode with Networking then hit
- Windows will now load the SafeMode with Networking.
- Press and hold both R key and Windows key.

- If done correctly, the Windows Run Box will show up.
- Type in the URL address, [product-url] in the Run dialog box and then tap Enter or click OK.
- After that, it will download the program. Wait for the download to finish and then open the launcher to install the program.
- Once the installation process is completed, run [product-code] to perform a full system scan.

- After the scan is completed click the “Fix, Clean & Optimize Now”button.